
Thought I’d share my unsolicited (well ‘sorta-solicited’ – Randi asked me in the nice handwritten note that came with my bag to let them know what I thought of it) thoughts on my @randijofab Jeff ’n’ Joan’s bag. / I got one of these bags when they first launched ‘em – I had been wanting a Jones Loop Bar specific bag for quite some time and had seen a few others, but none of them were compelling enough for me to pull the trigger. Once I saw that Randi was making one, I knew it was fate. / I’ve had the bag about 8 months now and I’m really happy with it. It keeps things handy and easy to access while riding. I use it a lot in what I call ’basket mode’ – open all the time so as to just grab stuff from it. Today it held my gorilla pod, phone, keys, wallet, gloves, and my double chocolate chip muffin with some room to spare. / I often don’t close it fully unless I’m leaving the bike to go in somewhere or if it starts raining. The roll top and one handed magnetic clip make it easy to close up fast on the fly. / As with all Randi’s stuff, construction is top notch. For the most part I’ve found it pretty much weatherproof. Waxed canvas is not really touted as ‘waterproof’, but I think it should get you through most rainstorms and all but a complete submersion. The waxing on this canvas/bag does seem to be a bit more ‘water resistant’ than some of the other Randi products I have. I would assume you could continue to add wax to it as well over the years to maintain/build up water resistance. / I haven’t found a use for the mesh exterior pockets yet, haven’t needed them. They’re small, so basically for things like gels, change, or possibly your kids’ Pokemon coins. I could see making use of ‘em on longer trips, but I’m mostly using the bag on the daily commuter. / I’m happy to find that the bag doesn’t interfere with the alternate hand positions afforded by the Jones bar. On the contrary, when closed and rolled down it still allows for use of ‘loop’ hand positions as well as offering a bit of a padded resting spot in some cases. / Overall, I’m glad I bypassed the other Jones bar bags I’d seen and held out for this one. It works great, is well made and I suspect will be carrying my chocolate muffins for years to come.
Tag Archives: RandiJo Fabrications
The Surly Pugsley Adventure Bike
I honestly don’t remember when I first saw a fatbike. I know it was a Surly Pugsley. It may have been a prototype floating around the interwebs. I do remember when they first put a production one in the catalog. I remember thinking that it was awesome. And I knew instantly a lot of people weren’t going to get it. Not right away anyway. I was excited about it.
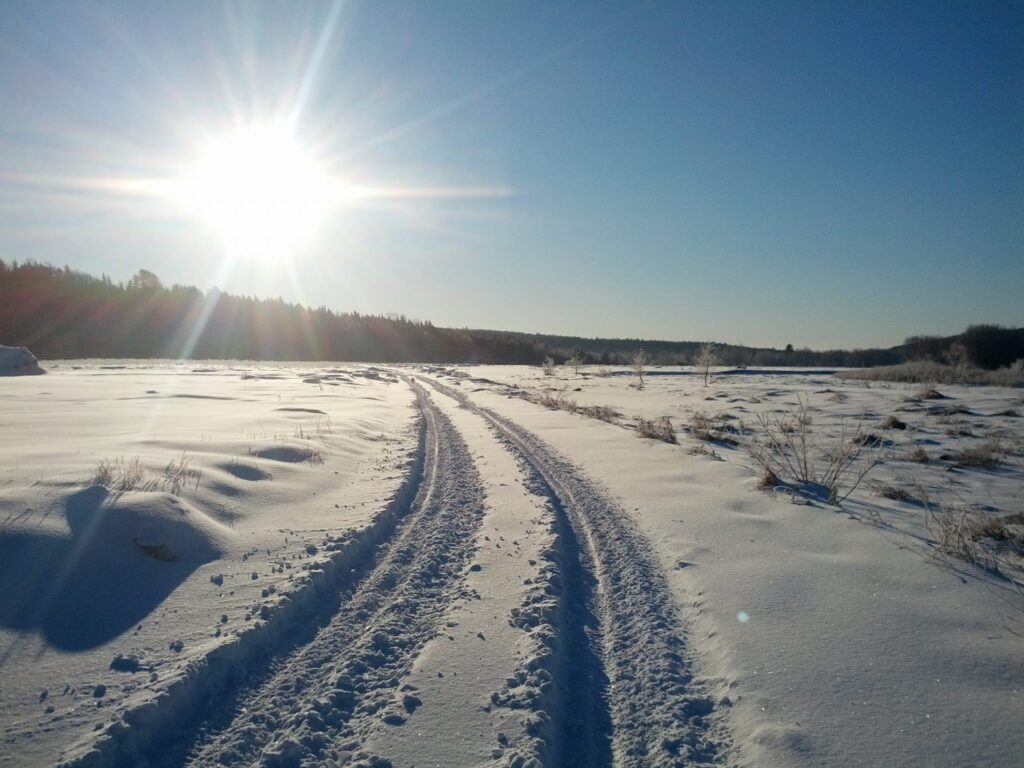
Many years later, after following along on the development of fat, I finally landed a Pugsley. It was winter of 2013. All along I had been drawn by the snow capabilities of it. After all, that was what was being touted too. I planned to try and commute with it through the winter along the snowmobile trails in my region of the world. Though it proved to be – and still is – plenty snow-capable, my commute just turned out to be too long geographically to make it work – for the time being. Having to get kids out of bed, moving and on buses in the am didn’t leave me enough time to get to work through the snow. I resigned myself to the evening and weekend blasts through snowshoe and footpacked trails in the woods, still good times.
Even before the snow melted, I started to get curious. I had suspicions. “I wonder how this thing would handle on dry singletrack? How would it feel on the trails?“
Turns out – as many people now know – that answer was pretty damn fantastic. The big tires suck up the bumps, provide a smoother and more enjoyable ride and give beginners and more advanced riders alike a much bigger margin of error. After a few rides in the spring through the woods, I was sold. My conventional MTB hung in the garage all summer. I had a new #1.
Many of the local XC/race cats all poopoo’d it. “It’s slow. It’s heavy. There’s no front shock.” I wasn’t concerned too much with going fast. I was just concerned with going. Even then, having had a taste of how the bike handled the trails, I told ’em, “you wait. The tech will catch up. They’ll get lighter, faster. People will be racing ’em.“
Even more than that, I saw fatbikes as a primo beginner mtb. They offered some of the benefits of a full-sus bike, but still provided some rigidity and had less moving parts. Initially they were cost-prohibitive, but again, I told people who came into the shop – “you wait, the price will come down. More people will be making ’em.”
I still maintain that anyone looking for an entry level MTB hardtail now should at least give a fatbike a try. Especially considering that the cost of fatbikes has come down and many can be had at the same or lower pricepoint than an almost equally appointed hardtail. I know several people now who have started mountain biking on one and now have no intention of going to a conventional MTB. And as a bonus, they’ve got way more riding season.
Around this time too, I started commuting on mine as well. Being that I could ride to and from work almost entirely on crushed rock trails, I wasn’t worried about being speedy on the pave. I was worried about carrying stuff from time to time though. Groceries from the farmers market. Clothes for work. Stuff. Never been much a fan of backpacks on the bike though.
I started checking around for gear. Racks, bags etc. There wasn’t much initially. People still thought fatbikes were a fad. They were gonna go away.
Then 2 things happened – and I don’t remember what order they happened in, but they did. I stumbled on an article whereby someone had built up a set of 29″ wheels for their Pugsley and I started noticing lots of blog posts about guys strapping all kinds of junk on their bikes and going camping. These were holy shit moments for me.
Eventually, as I kept slogging along in my commutes and reading the internet all day, guys started putting bigger than usual mtb tires on these 29″ rims and also started making custom bags to carry stuff into the woods as it was easier handle the bikes in tight spaces with the gear secured closer to the bike vs. hanging about on racks a la more conventional touring.
These guys were camping, and mountain biking in between camping spots. Hnnnnng. Count. Me. In.
So eventually the formal monikers of ‘bikepacking’ and ’29+’ eventually became lexicon. During this time it dawned on me that the Pugsley would be an excellent platform to launch a sort of ‘multi-purpose adventure bike’. I could set it up with different wheels and tires, as well as different cargo configurations to suit all kinds of different terrain and trips and still maintain relatively the same feel and cockpit.
So that’s what I did.
There’s no argument that there are other bikes out there that will excel in some conditions where this one will be only ok, but there’s no one perfect bike. I wanted to try and create a jack-of-all-trades, knowing it would be a master-of-none.
So I had the stock 26″ wheels with 3.8″ tires. I built me up some 29″ rims to run 3″ tires. I got some racks and panniers for hauling the kitchen sink on trips to the market, or say, with the kids where I might have to carry gear for 2 or 3, but also got some fast and light bikepacking bags for solo adventures. If I really want to pack some shit, I can combine the two.
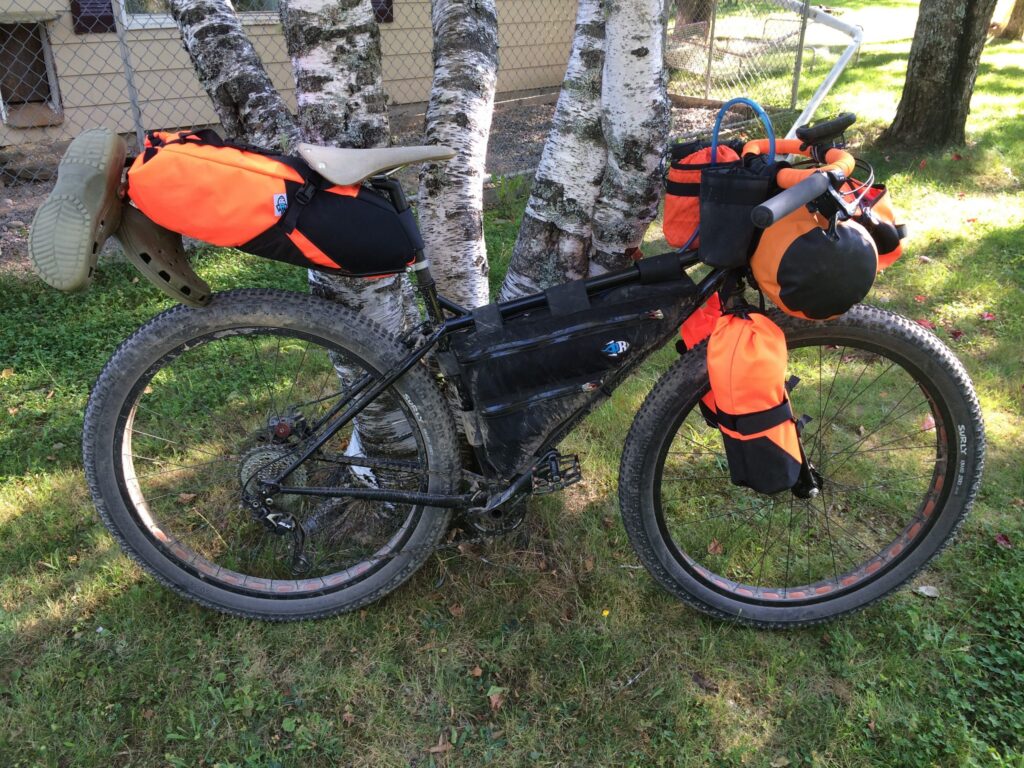
So thats what we’ve come to. What I’ve dubbed the Pugsley Adventure Bike. Snow? It’ll do it. Sand? Yep. Singletrack? Loves it. Long gravel grinds? Sho’ nuff. I’ve yet to christen it with an overnighter, but I will. That’s the only thing left to do.
Build Spec
Frameset
Surly Pugsley ‘Necromancer Edition’, Moonlander Fork
Seatpost clamp: Surly Stainless, 30.0mm
Drivetrain
Crankset: SRAM x5
Chainring: Blackspire narrow-wide, 32T
Bottom Bracket: SRAM
Rear Derailleur: Shimano XLS, clutch, 9-speed
Cassette: Shimano Deore, 9-speed 11–32t
Chain: Shimano Deore, 9-speed, narrow-wide
Pedals: 45 NRTH Heiruspecs/Crank Bros. Candy C
Components
Headset:Cane Creek 40
Brakes: Avid BB7, 160 mm rotors front and rear
Brake Levers: Avid BB7
Shifter: Shimano XT 9-speed
Stem: Bontrager RL
Handlebar: Jones 710 mm Loop Bar, Aluminum
Grips: ESI Jones, Extra Chunky
Saddle: Brooks, Cambium C17
Seatpost: Kalloy
Wheels – 26″ Fat Setup
Front Hub: Surly Ultra New, 135 w/ bolts
Rear Hub: Shimano Deore
Rims: Surly Rolling Darryl
Spokes: DT Swiss Champion, 12mm brass nipples
Tires: Surly Nate, 26″ x 3.8″, 60 tpi rear, 120tpi front
Wheels – 29+ Setup
Front Hub: Surly Ultra New, 135 w/ bolts
Rear Hub: SRAM X9
Rims: Surly Rabbit Hole
Spokes: DT Swiss Champion, 12mm brass nipples
Tires: Surly Knard, 29″ x 3″, 120 tpi
Cargo Components
Frame Bag: Porcelain Rocket El Gilberto
Handlebar Harness: Porcelain Rocket MCA System
Seatbag: Porcelain Rocket Mr. Fusion
Salsa Anything Cages on Fork with Porcelain Rocket Anything Bags
RandiJo Fab Bartender Handlebar Bag
44 Bikes feedbag
Old Man Mountain Phat Sherpa front and rear racks
Serratus (formerly MEC house brand) front and rear pannier sets
Some Thoughts on Layering & Kit for Winter Running
You can do it too.
In an article at Gear Junkie that I posted earlier on Facebook and Google+ this week, Eric Larsen said something that really resonated with me. People are always commenting how I’m nuts to be out in such cold or that it’s weird that I like being out in it. What he said particularly was:
“People say they hate the cold. I think what they mean is they hate being cold. I agree, being cold sucks. It’s painful. I like being warm in very cold environments; you can do it, too.“
Same here. This morning I got up to go for a run and it was -17ºC/1.4ºF. That’s pretty f’n cold. Not arctic polar cold, but cold enough for most of us non-explorers. Most of these mornings I lay in bed, contemplating if I want to face the cold or not, I also am mentally figuring out what I’m going to wear if I do. I’ll check the temperature and conditions outside and then in my head, compare that with other times I’ve been out in same conditions and what I wore and what worked and what didn’t – i.e. did I freeze my ass off or overheat. Another factor will be what kind of activity I’m doing and how long I anticipate doing it for.
So along those lines I thought I’d share what I wore today as maybe it will help some of you sort your own kit:
Feet
1. Thin cotton sock – most people, including me, will tell you that cotton next to skin is a no-no, and that’s true, but I don’t have any thin/liner weight wool socks. I hope to remedy that in the near future. I put these on today and rolled the dice. I won.
2. Grocery bags – yup, you read that right. Low tech, but never fails. Cheap vapor barrier.
3. Medium weight Smartwool sock.
4. Salomon Speed Cross shoes – while not a winter shoe specifically, these do have some tech and materials designed to keep water and cold out. More of a ‘fall/muck’ shoe.
Legs
5. Synthetic long underwear – cheapie stuff from Walmart.
6. Fleece/thermal cycling tights – these are Performance house brand ones I’ve had for at least 10 years. Still in great shape. Right leg has broken zipper pull replaced with a paper clip. I’m punk rock.
Torso
7. Under Armor ‘Cold’ base layer – wicking/thermal
8. Merino Wool Cycling jersey – wicking/thermal – added bonus doesn’t collect stink!
9. MEC Derecho Cycling Jacket – shell/wind – nice because it has full zippers up the sides/armpits that allow you to vent easily if you start to heat up.
Misc
10. Buff – This provides a nice ‘gasket’ at the neck to keep out drafts – something I hate. It’s also great ’cause if it’s too cold once you get out you can pull it up over your nose/mouth. I don’t even have the wool/winter version, just the basic one.
11. Trusty wool RandiJoFab cycling cap – this one’s got built in flip down earflaps if needed. I like it vs. a normal winter cap too, ’cause it has a brim.
12. Salomon running vest – this is the first time I’ve run with this even though I got it some time ago. I don’t normally take water with me on short runs, but lately when it’s cold I find I get thirsty sooner. Maybe it’s the cold air or my mouth dries out faster, I dunno. Perhaps, my body’s using up more water for heating so it’s telling me to drink. After reading again in the article the importance of eating/drinking, I decided at the last minute to throw some water in it and take it along. I’m glad I did. I didn’t actually end up drinking anything, but it was a great trial run. The pack is comfortable, streamlined and fit great underneath my shell layer. I actually sorta forgot I was even wearing it.
Hands
13. Some thin Head gloves from Costco – while not meant to be a liner glove, these are the closest thing I have. Also nice is they have the pads on the fingers that let you use them with a smartphone.
14. Pearl Izumi Amfib Cycling Gloves – as an outer glove.
Today I probably could have just gone with one pair of gloves, the Pearl Izumis, but it’s always nice to be able to take off the bulky outer glove to adjust snowshoe bindings or access zippers/pockets, without exposing your hands to the cold.
I wore all this too, bearing in mind that I wasn’t going to be stopping anywhere for any great length of time and would keep my body temp up with activity. If I had planned anything like that, I would have brought extra layers to add on for those times of inactivity, as Eric mentioned in his article.
Overall, I had a great time and wasn’t too cold or hot – BAM – nailed it! Nothing is better than getting outside any time of year and getting your kit selection just right.